scale-tone
Service-to-Service calls with Managed Identities, in Azure and also on your devbox.
People have already blogged a lot about Azure Managed Identities, and specifically about how to secure service-to-service calls with them. So here I’ll just briefly outline the easiest way to achieve that.
OK, so you have two RESTful services running in Azure - the-caller and the-callee. And you want to let the-caller make authenticated calls against the-callee, but don’t want to bother yourself with secrets, certificates, Key Vaults etc.
The-caller will typically be your Asp.Net/Asp.Net Core backend hosted as an Azure App Service, Azure Function App or Azure Container Instance (could also be language other than C#, but you would need to make handcrafted REST calls for obtaining tokens, rather than using a library). A plain .Net Console App or Windows Service running on a VM will also do.
The-callee can be written in any language, but needs to be hosted either as an App Service or as a Function App.
-
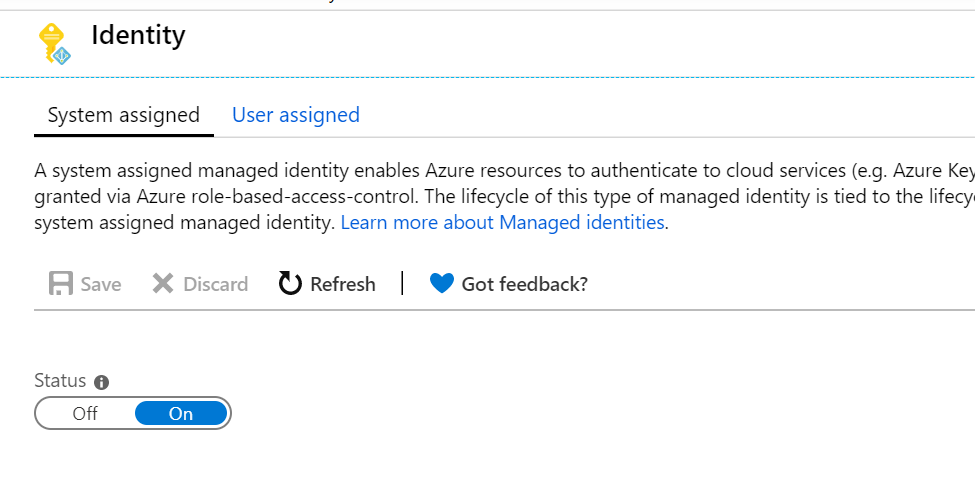
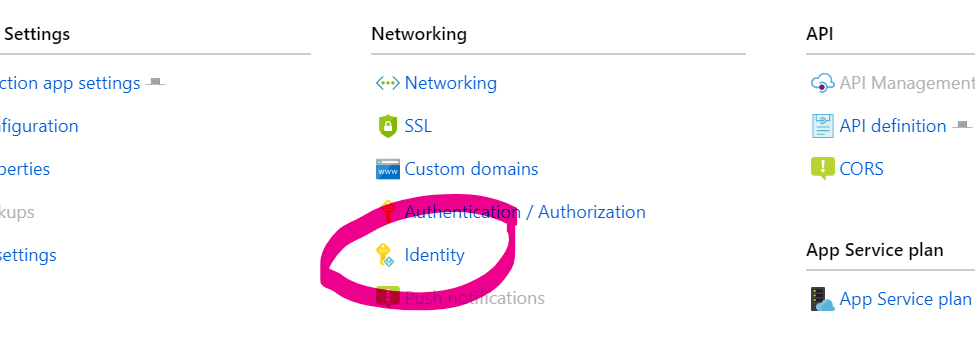
Enable system-assigned Managed Identity for the-caller:
And take note of it’s Object ID:

Let’s call it CallerObjectId further on.
-
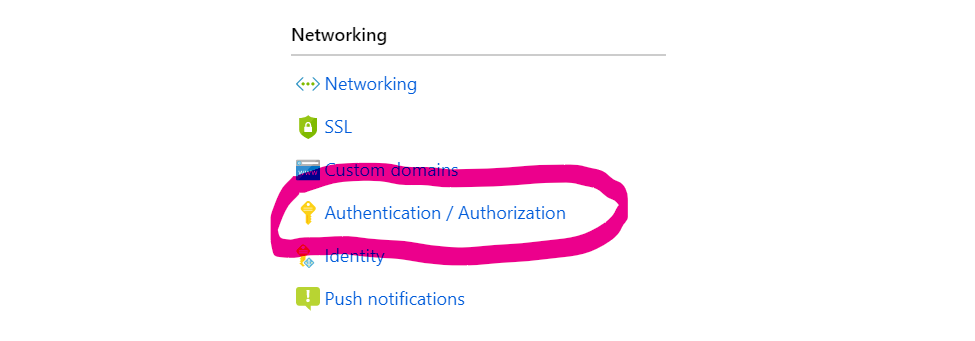
Configure EasyAuth with AAD in Express Mode for the-callee:
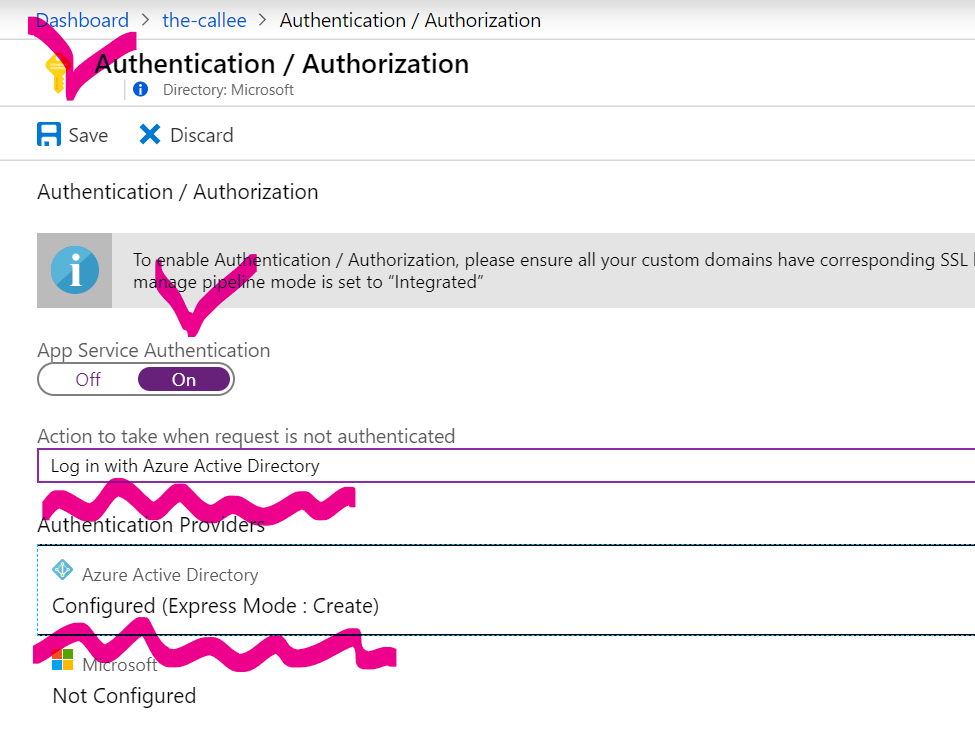
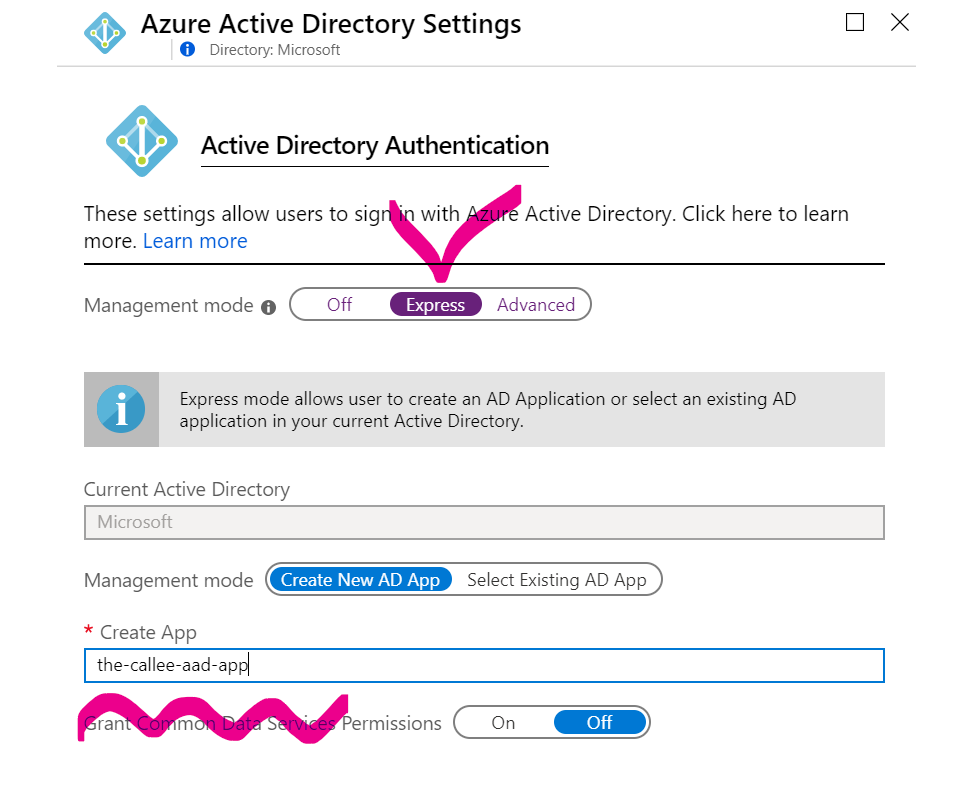
Note the name of AAD app, that will be created for you as part of Express Mode setup. On the screenshot above it is the-callee-aad-app.
NOTE: if your the-callee already has an AAD app, no need to recreate it. Also it’s perfectly OK to use Advanced Mode, just in that case you’ll need to create an AAD app and put some more parameters manually.
-
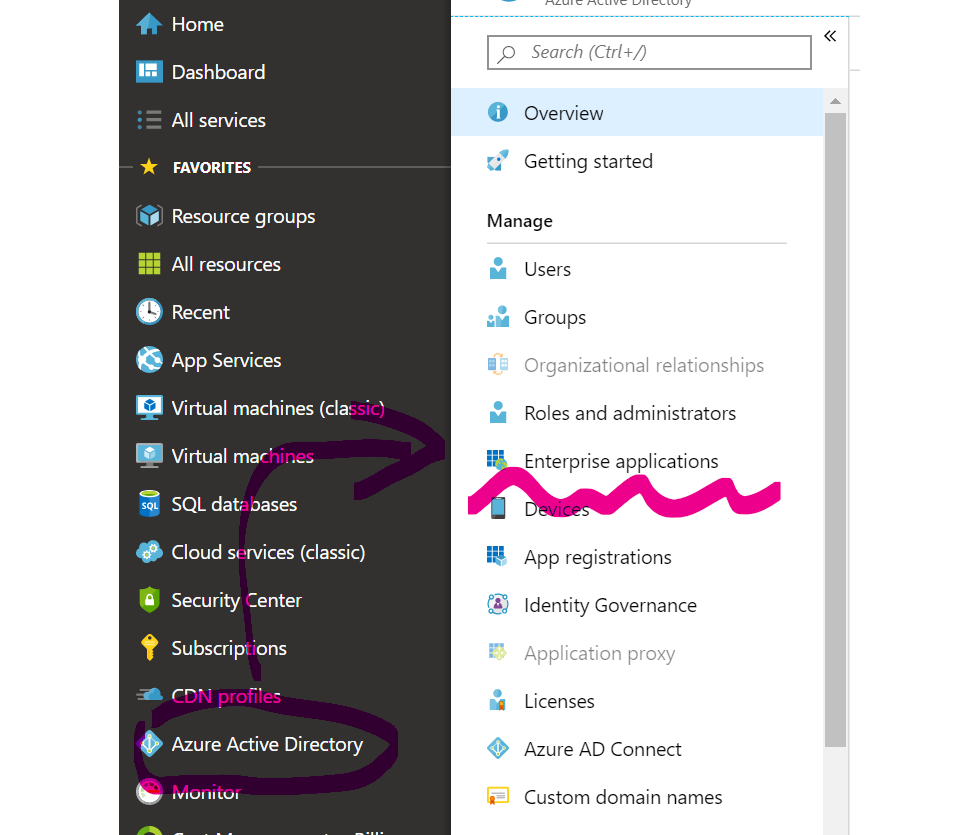
This step is essential, otherwise the-callee might potentially be left accessible by unauthorized users. Go to AAD Enterprise Applications:
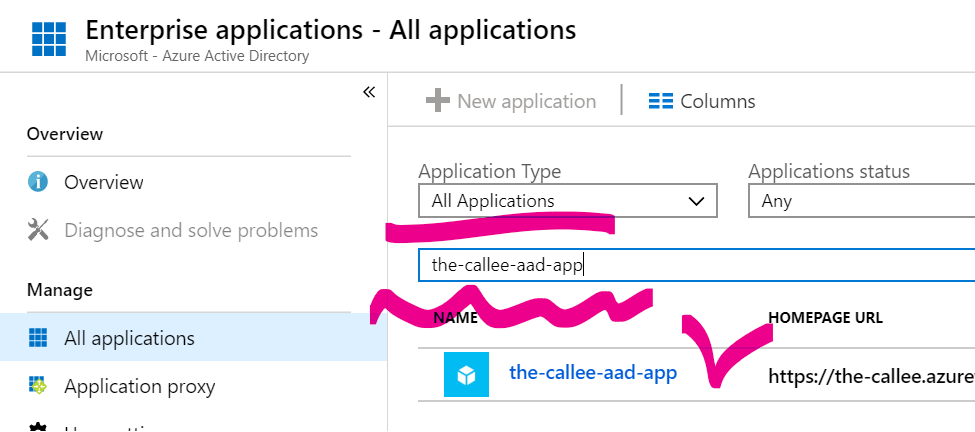
, find the-callee-aad-app there by name:
, open its Properties tab and ensure that User Assignment Required is set to Yes and Visible to Users is set to No:
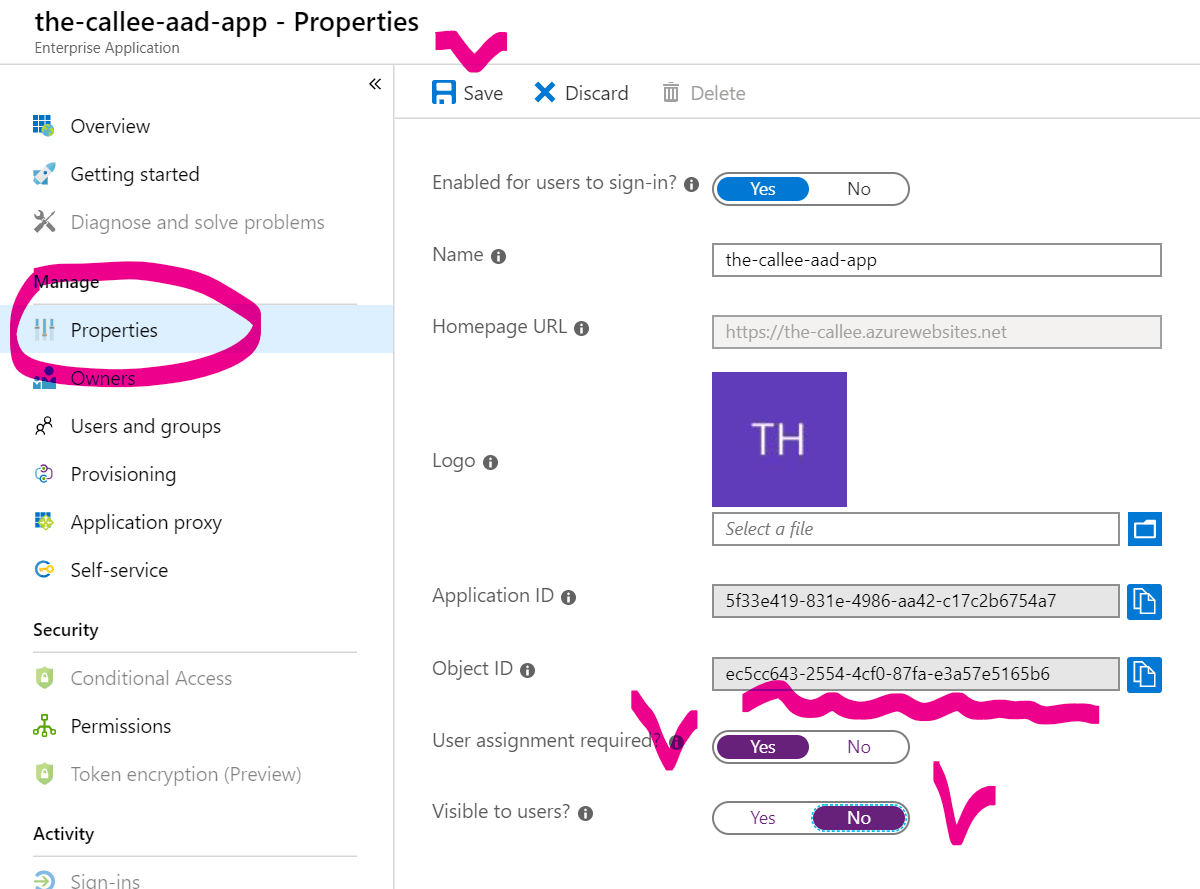
Since our current goal is to make the-callee only callable from another service (and never with a user-specific access token), no arbitrary user should ever be allowed to login to the-callee-aad-app with OAuth2 Implicit Grant flow, and that’s what we ensure here.
-
While you’re still on the Properties tab, take a note of the-callee-aad-app’s Object ID. Let’s call it CalleeObjectId, we’ll need it later for making a role assignment.
-
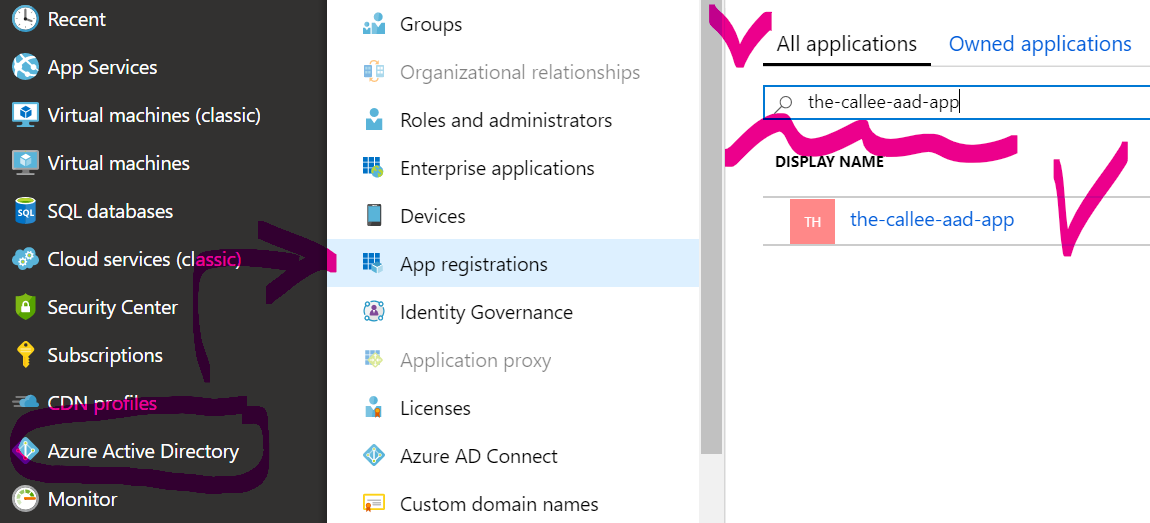
To be even more sure that the-callee-aad-app is configured properly, go to AAD App Registrations, find the-callee-aad-app there by name:
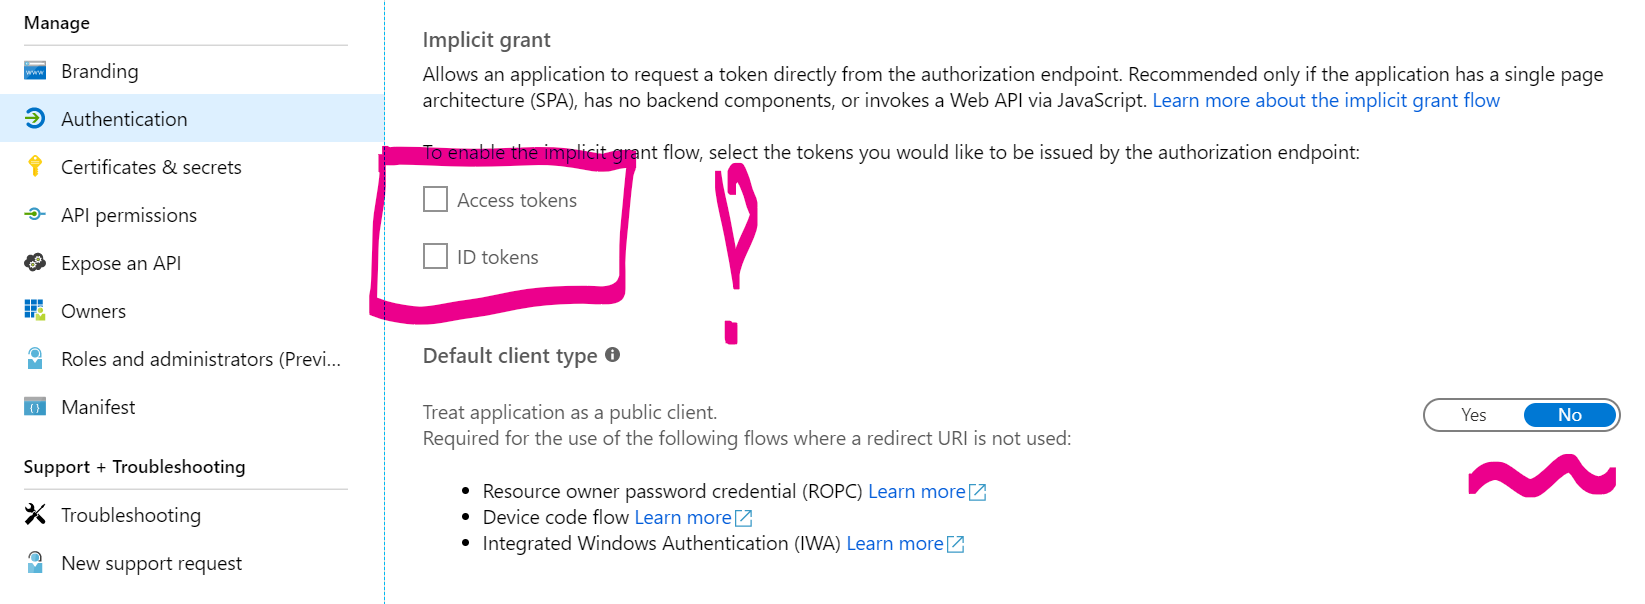
and on the Authentication tab check that neither Access tokens nor ID tokens are enabled:
-
While the-callee-aad-app’s App Registration page is still open, go to Expose an API tab and take a note of it’s Application ID URI value:
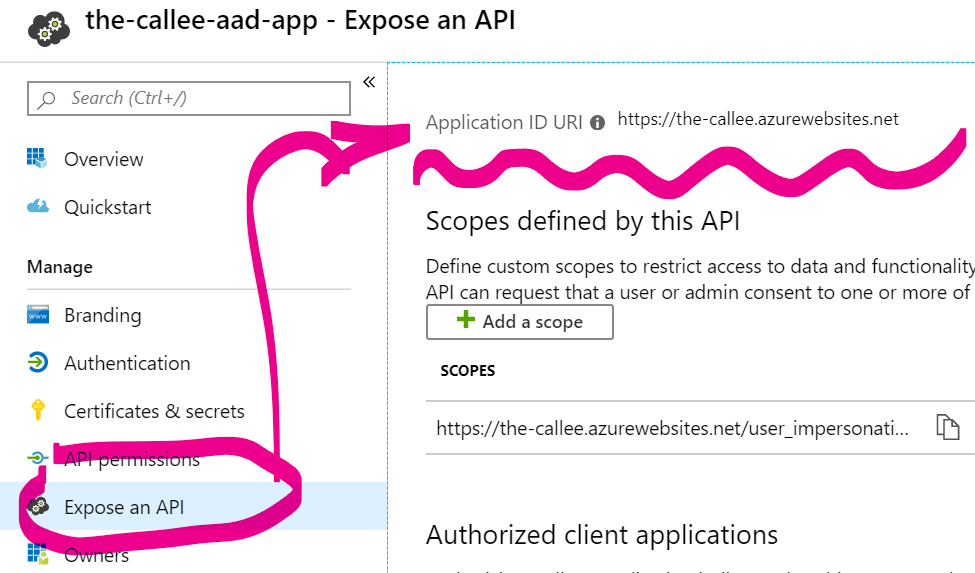
Let’s call this value CalleeResourceId, and this is what your code will be using when obtaining access tokens. It might happen that your Application ID URI is empty - in this case you just need to set it to something (default value provided by Azure Portal will work).
-
Finally, grant the-caller access rights to the-callee (yes, AzureAD Powershell Module is currently the only way of doing this):
New-AzureADServiceAppRoleAssignment -Id 00000000-0000-0000-0000-000000000000 -ObjectId <CallerObjectId from step1> -PrincipalId <CallerObjectId from step1 again> -ResourceId <CalleeObjectId from step4>The Id parameter here is the App Role Definition Id (which you’re supposed to previously define by manually editing AAD app’s manifest), but if the-callee doesn’t use app roles (which is quite likely for a typical backend API), then you can save your time and just specify Guid.Null (the Default role).
Now, with the following code (being executed on the-caller’s instances in Azure):
 var tokenProvider = new AzureServiceTokenProvider();
 string accessToken = await tokenProvider.GetAccessTokenAsync("<CalleeResourceId from step6>");
you obtain an access token, which is then accepted by the-callee:
AzureServiceTokenProvider class comes from Microsoft.Azure.Services.AppAuthentication library and does all the token generation magic in C#. In other languages you’ll need to make a local HTTP call yourself.
That’s all great, you might say, but how do I now debug my stuff locally? Specifically, how do I get access tokens for calling the-callee from my devbox?
Fortunately, it is now also possible. The above token generation code can also work locally, with no code changes required! You just need to make a bit more configurations, and here is how.
8. Ensure you’re logged in with a proper account into Azure CLI on your devbox:
az account show
When running locally, AzureServiceTokenProvider tries to reuse your credentials saved by Azure CLI for generating tokens, so it is important to be properly logged in.
9. Go to the-callee-aad-app’s App Registration page, choose Expose an API tab and add Azure CLI to the list of Authorized Client Applications:
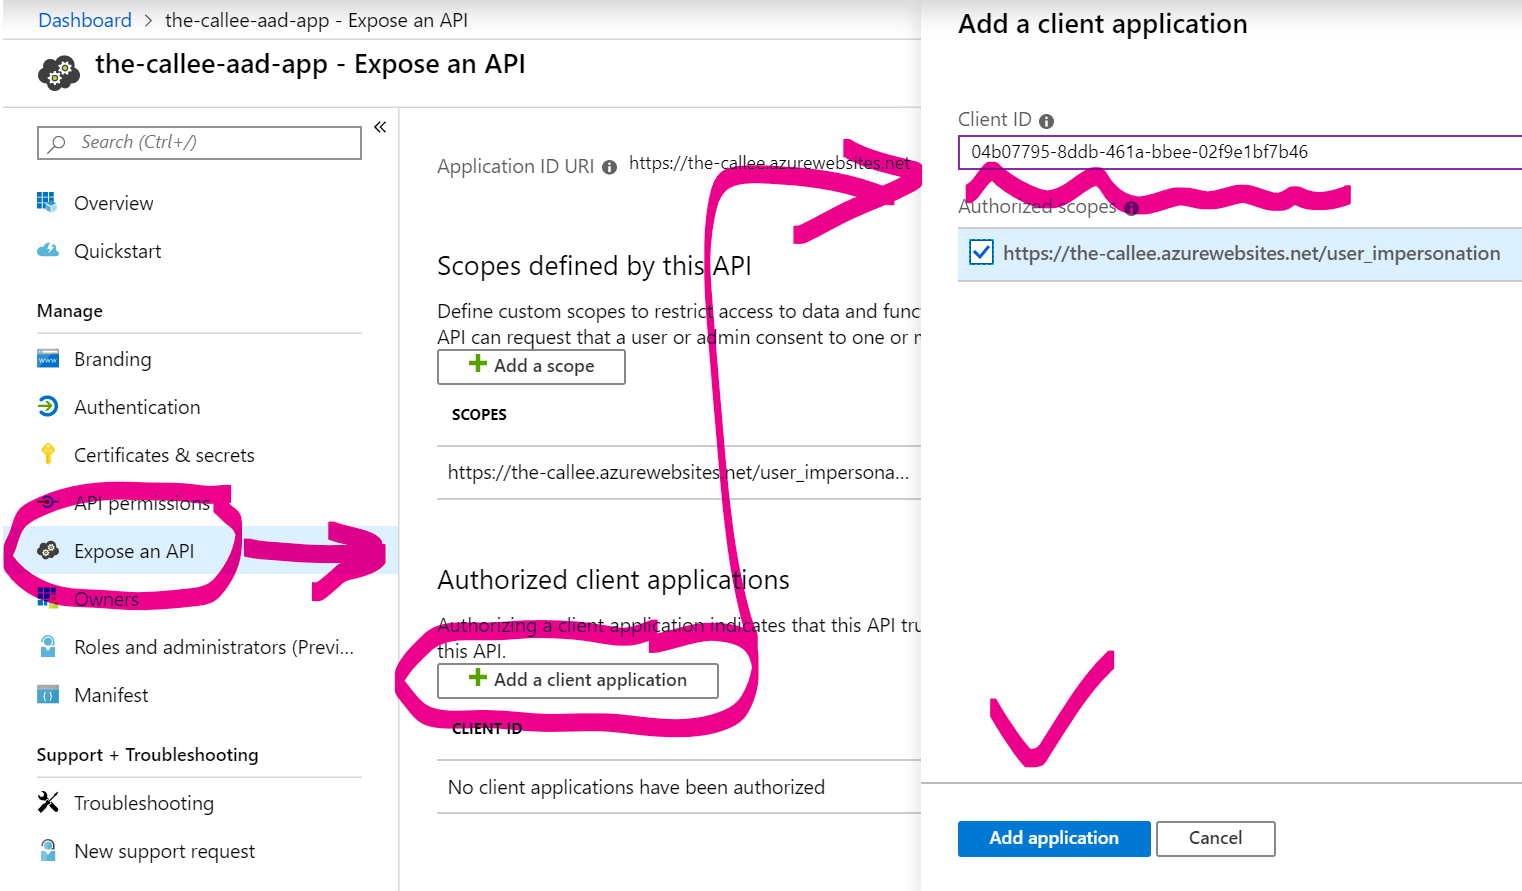
The Azure CLI’s Client ID is 04b07795-8ddb-461a-bbee-02f9e1bf7b46. With this step you’re basically declaring: “I, the-callee, am now going to accept tokens issued by Azure CLI app for its users, provided that the audience claim in them matches my Resource Id”.
10. Now run the token generation code locally and observe an exception:

This tells us that not all users are allowed to obtain these tokens, but only whitelisted ones. So, you now need to whitelist yourself (and probably other team members).
11. Find the-callee-aad-app in AAD Enterprise Applications again, go to Users and Groups:
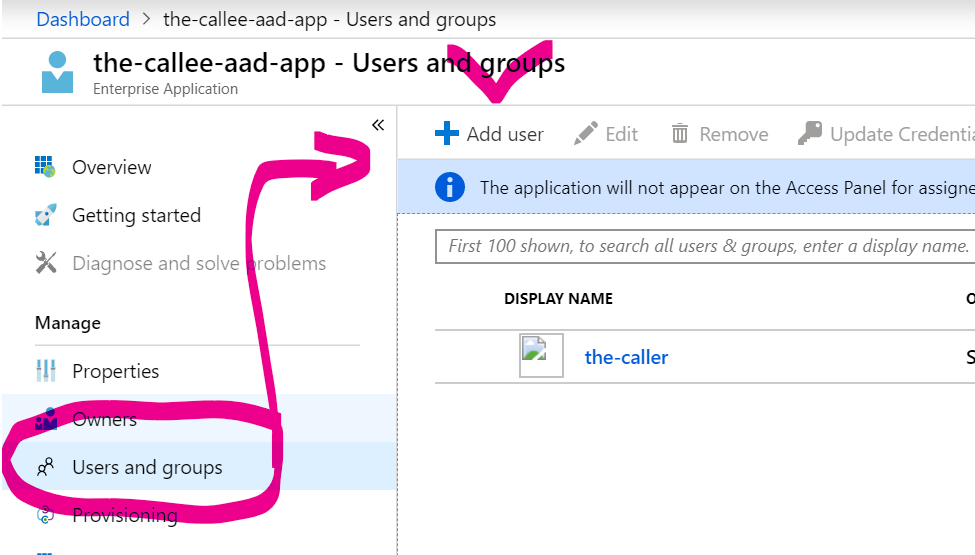
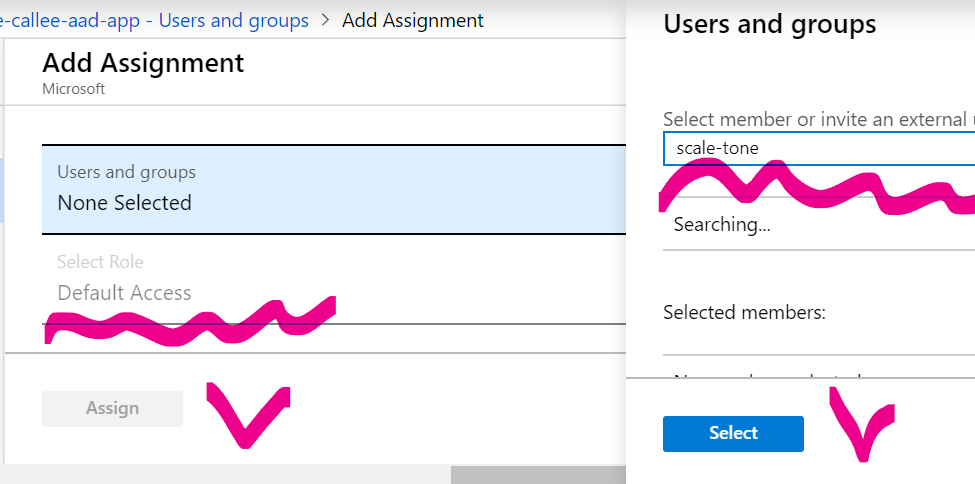
and add some users and/or groups:
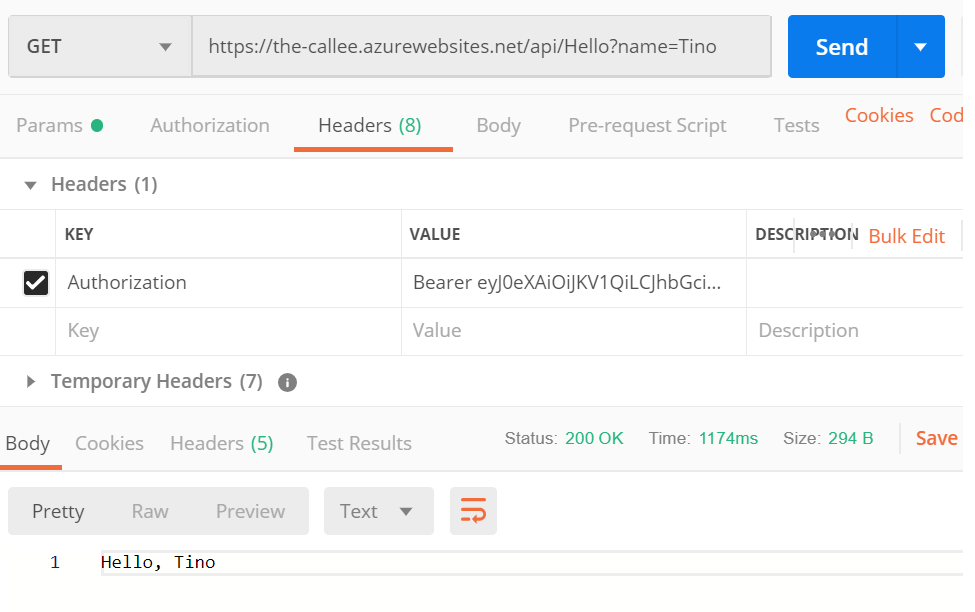
Give it ~10 minutes to propagate, and if you now re-run the token generation code, the token should be successfully issued and accepted by the-callee:
If you decode this token (with e.g. https://jwt.io), you’ll notice that, unlike the token for Managed Identity, this one is user-specific, and it has your name in it. And of course, it is important to remember, that steps 8-11 should only be executed for dev environments. Prod (and probably test also) environments should only utilize Managed Identities and never be accessible from devboxes.
The only scenario left untouched here is how to make your integration tests work on an arbitrary build machine. That is also achievable by using Azure Service Principals, and it was something I blogged about a while ago.
UPD1: the above-described devbox setup relies on credentials stored by Azure CLI, but if you have Visual Studio (2017 v15.5 or higher) installed, AzureServiceTokenProvider can alternatively use its Azure credentials as well. Visual Studio’s Client ID is 872cd9fa-d31f-45e0-9eab-6e460a02d1f1, so you’ll need to add this one to Authorized Client Applications instead.
UPD2: AzureServiceTokenProvider sequentially tries multiple approaches for obtaining tokens, which might be time-consuming. To give it a hint which exact mode to use on your devbox, you can create an AzureServicesAuthConnectionString environment variable set to “RunAs=Developer; DeveloperTool=AzureCli” (to use Azure CLI) or to “RunAs=Developer; DeveloperTool=VisualStudio” (if you prefer Visual Studio).
UPD3: Here is what AzureServiceTokenProvider is actually doing when obtaining tokens under Azure CLI’s context - it simply executes the following Azure CLI command:
az account get-access-token -o json --resource <CalleeResourceId from step6>
You can do the same for testing purposes or if there’s no AzureServiceTokenProvider for your programming language.