scale-tone
DynamoDB + ElastiCache + Linq2DynamoDB + OData. Practice. Backend.
In my previous post I was talking about concerns, that you might experience when developing cloud services with AWS DynamoDB and C#, and how Linq2DynamoDB can help. Now let’s do a practical exercise and create a simple OData resource for storing and querying for notes. The data will be stored in AWS DynamoDB and cached in Redis. The service will also implement user authentication by validating and parsing OpenID Connect ID tokens passed via Authorization HTTP-header. This will allow us to authenticate users with their Google Account credentials.
NOTE: you can find the full source code of this sample on GitHub.
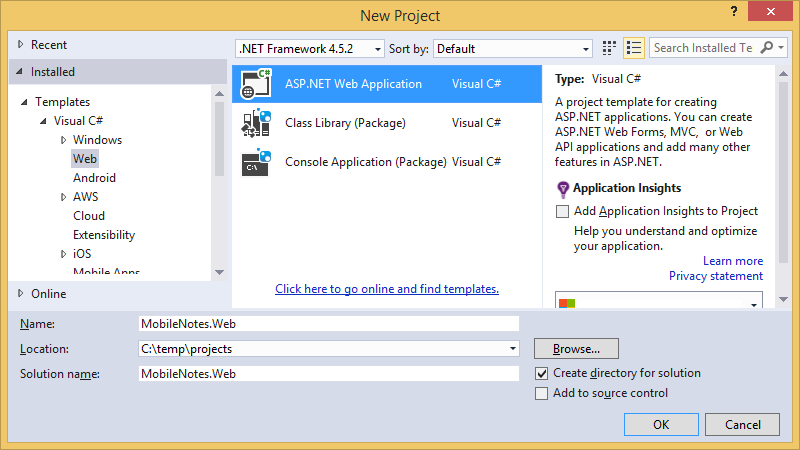
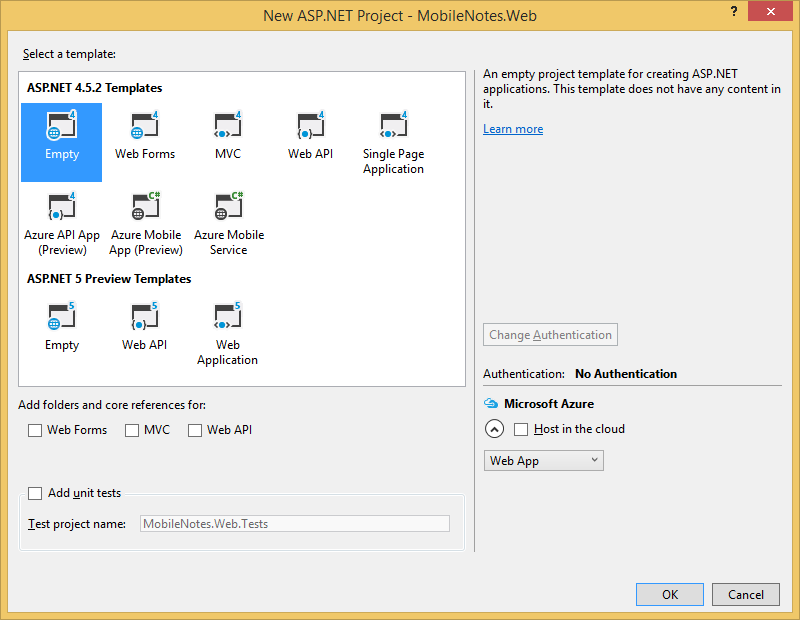
1. Start Visual Studio and create an empty ASP.Net project.
2. Add the following NuGet packages to the project with Package Manager Console:
Install-Package Linq2DynamoDb.DataContext.Caching.Redis
Install-Package Linq2DynamoDb.AspNet.DataSource
Install-Package System.IdentityModel.Tokens.Jwt
The first two packages bring AWSSDK, Linq2DynamoDB and StackExchange.Redis to your project, while the last one will be necessary for parsing JWT tokens.
3. Define your entity. In this example it will be just a simple Note class with three properties:
public class Note
{
   public string ID { get; set; }

   public string Text { get; set; }

   public DateTime TimeCreated { get; set; }
}
NOTE: as you can see, the entity declaration for Linq2DynamoDB is completely unobtrusive, it’s just a POCO. No base classes and no attributes are required. Though there’re other ways to define entities, those ways are more complicated, but might improve performance. Please, see more on this in Linq2DynamoDB documentation.
4. Create a class NotesDataContext and derive it from UpdatableDataContext. Also add two static fields - for AmazonDynamoDBClient and StackExchange.Redis.ConnectionMultiplexer:
public class NotesDataContext : UpdatableDataContext
{
   private static readonly IAmazonDynamoDB DynamoDbClient;
   private static readonly ConnectionMultiplexer RedisConn;

   public NotesDataContext() : base(DynamoDbClient, String.Empty)
   {
   }
}
NOTE: in this example we store DynamoDbClient and ConnectionMultiplexer instances in static fields just for simplicity and to emphasize, that both these objects are long-lived and should be created just once. In production code you would probably inject them into NotesDataContext’s constructor by means of your DI-container.
5. Add a static constructor, where the connections to DynamoDB and Redis are initialized:
static NotesDataContext()
{
   DynamoDbClient = new AmazonDynamoDBClient();
   RedisConn = ConnectionMultiplexer.Connect(ConfigurationManager.AppSettings["RedisConnectionString"]);

   new DataContext(DynamoDbClient, string.Empty).CreateTableIfNotExists
   (
      new CreateTableArgs\<Note>("UserId", typeof(string), g => g.ID )
   );
}
The last code line here creates the Note table, if it doesn’t exist yet. Pay attention to “UserId” string there - it defines a name for the HashKey field. And this field is intentionally not defined in our entity class - it will be filled automatically by Linq2DynamoDb.DataContext. See the next step for explanation.
6. Now add a property, that will represent the collection of Note entities:
public DataTable<Note> Notes
{
   get
   {
      string userId = "demo_user_id";
      return this.GetTable<Note>(userId, () => new RedisTableCache(RedisConn));
   }
}
Here the first parameter of GetTable<TEntity>() method is what makes our data model “user-specific” (this term I was trying to illustrate in my previous post). The resulting entity collection will contain the specified user’s entities only. And here is the right place to implement the actual user authentication and extraction of some userId. This step we’ll make a little bit later.
7. Add AWS credentials and Redis connection string to your web.config file:
<appSettings>
   <add key="AWSAccessKey" value="your access key>" />
   <add key="AWSSecretKey" value="your secret key>" />
   <add key="AWSRegion" value="ap-southeast-1" />
   <add key="RedisConnectionString" value="your Redis server address or multiple addresses of cluster nodes>" />
</appSettings>
NOTE1: Please, don’t store your AWS credentials in clear text in a config file in production. There’re many better ways to implement that. E.g. you can use AWS SDK profiles.
NOTE2: An MSI-file for installing Redis on your local Windows machine can be downloaded from here. After installing it you can just set the RedisConnectionString config parameter to “localhost”.
At this point we have a ready to use data context, and next we’ll expose it to the web as an OData feed.
8. Add a text file named NotesDataService.svc and paste the following line to it:
<%@ ServiceHost Language="C#" Factory="System.Data.Services.DataServiceHostFactory, Microsoft.Data.Services, Version=5.0.2.0, Culture=neutral, PublicKeyToken=31bf3856ad364e35" Service="MobileNotes.Web.NotesDataService" %>
9. Add a CS-file named NotesDataService.svc.cs and paste the following code to it:
using System.Data.Services;
using System.Data.Services.Common;

namespace MobileNotes.Web
{
   public class NotesDataService : DataService<NotesDataContext>
   {
      public static void InitializeService(DataServiceConfiguration config)
      {
         config.SetEntitySetAccessRule("*", EntitySetRights.All);

         config.DataServiceBehavior.MaxProtocolVersion = DataServiceProtocolVersion.V2;
      }
   }
}
NOTE: setting the MaxProtocolVersion to DataServiceProtocolVersion.V2 is essential for correct JSON output format support.
Congradulations, you just created a WCF Data Service and initialized it with NotesDataContext. Now if you start you project and browse for http://localhost:3300/NotesDataService.svc/Notes (the port number might be different in your case), you’ll be able to see the contents of your Note DynamoDB table as an AtomPub feed:
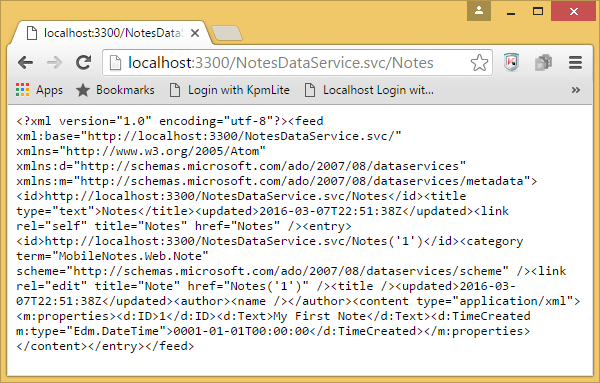
Add some records to the table via AWS Console with UserId field set to “demo_user_id” (don’t forget to flush your Redis instance after that!) - and they will appear in your browser.
Yet the last thing to do on the server side is to implement user authentication and fill the UserId field with something more user-specific. The naive way could be to pass the userId via some HTTP header with each request, but this would be insecure, of course: the service must be able to prove, that the passed userId really belongs to the requesting user. So, for this example I decided to write a piece of code for validating and parsing Google’s ID tokens (as it was quite easy to implement). Let’s just use that code.
10. Add a class named GoogleJwtParser to your project and replace it’s code with the following:
class GoogleJwtParser
{
   public static string ValidateAndGetUserId(string tokenString)
   {
      var validationParams = new TokenValidationParameters
      {
         ValidateAudience = false,
         ValidateIssuer = true,
         ValidIssuers = new [] { "accounts.google.com", "https://accounts.google.com" },
         IssuerSigningKeyResolver = (t, securityToken, identifier, p) =>
         {
            var certificate = new X509Certificate2(CertsInBytes.Value[identifier[0].Id]);
            return new X509SecurityKey(certificate);
         }
      };

      SecurityToken validatedToken;
      var principal = new JwtSecurityTokenHandler().ValidateToken(tokenString, validationParams, out validatedToken);
      return principal.Claims.First(c => c.Type == "http://schemas.xmlsoap.org/ws/2005/05/identity/claims/nameidentifier").Value;
   }

   private static readonly Lazy<IDictionary<string, byte[]>> CertsInBytes = new Lazy<IDictionary<string, byte[]>>(() =>
   {
      using (var client = new HttpClient())
      {
         var certsString = client.GetStringAsync("https://www.googleapis.com/oauth2/v1/certs").Result;
         var certsInBase64 = new JavaScriptSerializer().DeserializeIDictionarystring, string>>(certsString);

         return certsInBase64.ToDictionary(p => p.Key, p =>
         {
            var certInBase64 = p.Value
               .Replace("-----BEGIN CERTIFICATE-----", "")
               .Replace("-----END CERTIFICATE-----", "")
               .Trim();

            return new UTF8Encoding().GetBytes(certInBase64);
         });
      }
   });
}
This class uses JwtSecurityTokenHandler tool from System.IdentityModel.Tokens.Jwt package for dealing with tokens. Because Google’s ID token is signed with a certificate, the public part of that certificate must be downloaded from Google site, and that’s what happens at each service startup.
11. Now add the following method to your NotesDataContext class:
private static string GetUserIdFromAuthorizationHeader()
{
   try
   {
      var authHeader = HttpContext.Current.Request.Headers["Authorization"];
      var authHeaderParts = authHeader.Split(' ');
      return GoogleJwtParser.ValidateAndGetUserId(authHeaderParts[1]);
   }
   catch (Exception)
   {
      throw new DataServiceException(401, "Unauthorized");
   }
}
12. And replace the Notes entity set definition with the following:
public DataTable<Note> Notes
{
   get
   {
      string userId = GetUserIdFromAuthorizationHeader();

      return this.GetTable<Note>(userId, () => new RedisTableCache(RedisConn));
   }
}
Since now the service becomes inaccessible from browser any more, as it expects the Authorization HTTP header to be passed. You can test it with e.g. Advanced REST Client tool.
Wrapping Up
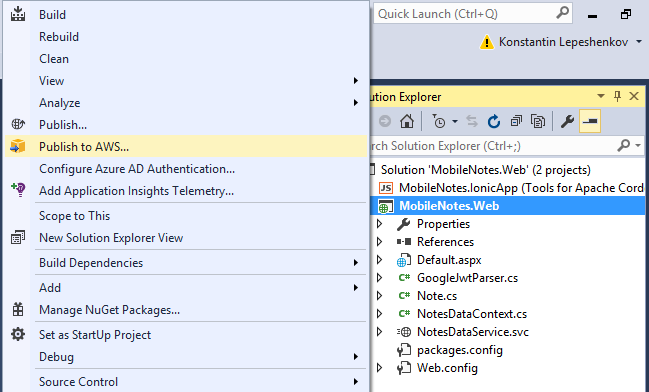
By now our simple Notes OData resource is ready. If you have AWS Toolkit for Visual Studio installed, you can easily host it with AWS Elastic BeansTalk by right-clicking on your project and selecting Publish to AWS:
Or you can host your service in Windows Azure (it’s Azure Redis Cache would do as well). Or wherever you like…
In the next post I’ll show you, how to consume this service from multi-platform mobile client built with brilliant Ionic framework and AngularJS. Please, stay tuned.